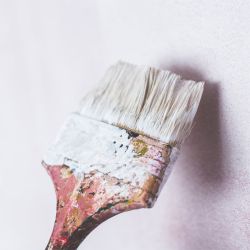
How to paint a bathtub

By Benjamin Clarke | Published on 11th March 2020
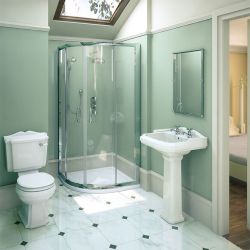
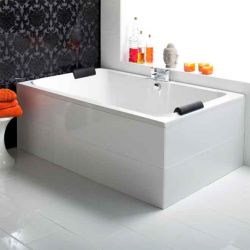
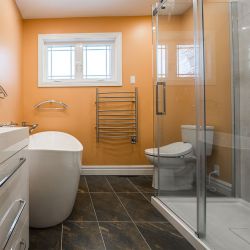
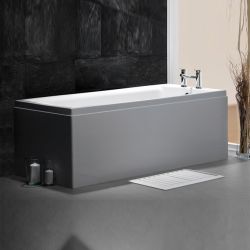
If you don't want to go to the expense of installing a new bathroom suite, then giving your bathtub a lick of paint is a cost-effective way of breathing new life into your bathroom.
Bathtubs are most commonly made from acrylic and enamel, though can also be made from plastic, steel or porcelain. All of these materials can be subject to scratching and chipping over the years and sometimes their original colour may no longer be fashionable.
However, in order to paint a bathtub, it's important to choose the right paint. A standard wall paint will simply not be up to the job, so you need to specialise.
Epoxy Paint
An epoxy paint comprises of a resin and hardener which combines to form a really durable, waterproof and solvent resistant coating on anything it's applied to.
It's commonly used on concrete floors, such as in a garage, workshop or basement, due to the fact it's so hardwearing. Importantly, it can also be used for providing a lovely finish on bathtubs as its adhesive qualities means it clings to the surface in a way that wall paints simply can't do.
When purchasing your epoxy, make sure you read the instructions thoroughly so you know what you're doing before you apply it to your tub.
The Painting Process
Step 1
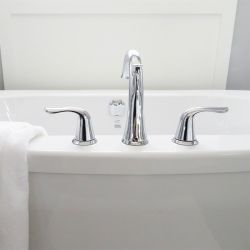
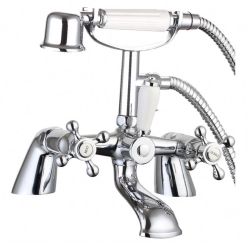
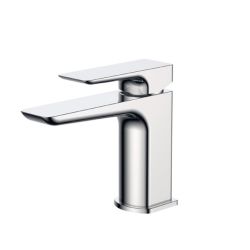
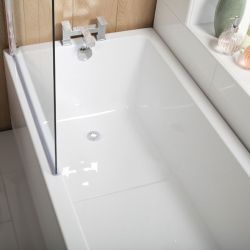
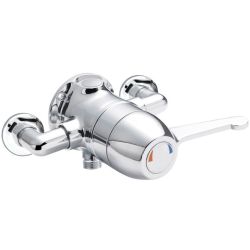
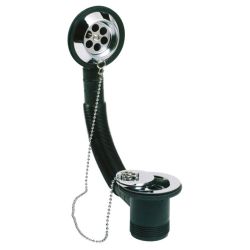
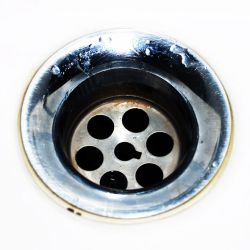
If possible, remove everything from your bathtub such as taps, plug holes, shower screens etc...You want to avoid getting epoxy on these fixtures, plus it makes painting the bathtub a much easier task. If it's not possible to remove everything, use masking tap to protect these sorts of things. Also mask off parts of the wall or other areas that do not require painting.
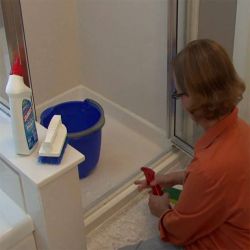
Step 2
Give your bathtub a thorough cleaning with soapy water and, if the finish is particularly bad, use some sandpaper to smooth off any areas that feel rough to the touch. Ensure the surface is completely dry before proceeding any further.
Step 3
Use a large roller on the main surface of the bath and a small paintbrush for any intricate parts that require extra care. The large roller will ensure a nice even coverage.
Step 4
It's highly likely you're going to need to apply a second coat of the epoxy. It's worth taking the extra time to do this as the job will last longer and you'll get a better finish. Make sure you follow the instructions given by the manufacturer of the epoxy. They will tell you how long to leave between each coat, how to store the epoxy while you're waiting and how to clean and store your brushes and rollers. This is an important step and should not be overlooked.
Step 5
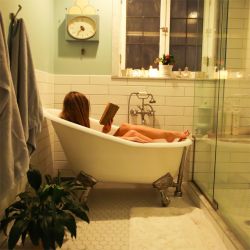
Once you've applied the second coat, don't be in a rush to use your bath too soon. Make sure you check the drying time given by the manufacturer and, if possible, double it to ensure that you don't damage the finish.
After being sure the coating has dried, you can run a bath and enjoy your bathtub again.
Please be aware that painting your bathtub with epoxy is not a permanent fix. Eventually it will start to degrade, however you should get a good few years before this happens and will have saved yourself a large amount of money compared to replacing the whole tub!
RELATED ARTICLES
Related Posts
-

Making small bathrooms beautiful and practical
As our population grows and cities become more cramped, the new houses and flats built to accommodate our ever-increasing s...
-

Making the most of small bathroom
It's becoming more common to face the challenge of a restrictive bathroom or washroom space. In this article, we look at th...
-

Why does your shower go hot and cold?
When you get in the shower, you want it to be a painless and trouble-free experience. You might be in a rush to get to work...
-
How to clean bathroom tiles
Because your bathroom is one of the busiest rooms in the house, it can very quickly get dirty and look below its best. ...
-

How to stop paint peeling in your bathroom
If you've got paint peeling off the walls and ceiling of your bathroom then you're probably a bit disheartened and concerne...
-

How to hide pipes in a bathroom
If installing a whirlpool bath in your bathroom, then one of the things you might want to consider is a method of how you c...
-

Can you take a bath after using self-tanner?
Living in the UK means that there isn't much opportunity to get a natural tan due to our climate. Not everyone has the mean...
-
Bathroom sink blocked? Here's what to do
Our bathroom sink takes a hammering multiple times day, so it's no surprise that from time to time the plughole gets blocke...
-

Using bath bombs in a whirlpool tub
Getting some bath bombs from high street retailers like Lush or The Body Shop can seem like a natural way to increase the f...
-
Should you be bathing your dog in the bathtub?
While many people will take their dog periodically to the doggie parlour to be clipped and washed, this can quickly become ...
-

Can bath water be reused?
In 2006, a survey of over 6,500 Japanese participants revealed that 55% of them reused their bath water for other purposes....
-

How much water does a bath use?
How humans impact the environment is an increasingly important factor when people make decisions in their everyday lives. I...
-
The latest luxury bathroom trends and designs
Our bathroom is such an important part of our lives and it's a place where we spend a huge amount of time on a daily basis....
-

Bathroom mosaic art
Any bathroom needs to be able to straddle the line between being a functional space and somewhere you can switch off and re...
-

Easy access bathroom designs
For anyone with impaired mobility, or a disability related to mobility, having a comfortable and easily-accessible bathroom...
-
Designing a retro bathroom
Many people are turning away from the idea that a modern bathroom must be minimalist with sleek, clean lines. Instead, ther...
-

How to maintain bathroom sealant
While not the most exciting topic in the world, sealant plays an incredibly important role in ensuring that a bathroom func...
-

How to choose the right bath panel
If you are upgrading your bathroom, or even just giving it an economical spruce-up, one of the jobs that can instantly tran...
-
How to choose a shower
Are you trying to decide on the best shower for your home? If you're completely redesigning, or even just simply updating, ...
-

The top 5 best bathroom design apps
If you're planning a refurbishment of your bathroom, you'll be pleased to know you don't necessarily have to struggle with ...
-
Ensuite bathroom ideas
If you're considering redecorating your ensuite, then deciding on the exact course of action can be overwhelming as there's...
-
The best low water pressure taps
When refurbishing a bathroom, it's easy to get carried away with the aesthetics of the fixtures and fittings without taking...
-
Different types of bathroom tap explained
If you are considering some new taps in your bathroom, perhaps as a whole-room refurbishment or just to freshen up your spa...
-
How to fit a basin mixer tap: A step-by-step guide
Though fitting a full bathroom suite is a job you'll want to get a professional in to do, if you've got a bit of DIY and pl...
-
How to fit a bathroom sink
It's good to know how to install a sink in your bathroom regardless of whether it's a brand new basin or if you're replacin...
-

Types of bathroom sink: choosing the best sink materials
Getting the right sink or basin for your bathroom or ensuite can be a real challenge, especially because there's so much ch...
-

Power Shower vs Electric Shower - What's the difference?
It's very common for people to question whether it's better to have a power or electric shower installed in their bathrooms...
-

How to play music in your bathroom
One of the best ways to add an extra layer of relaxation to our bathroom experience is by putting on some music. Whether it...
-

How to design your bathroom layout
By considering these simple steps and ideas, you'll feel confident about redesigning your bathroom, no matter how large or ...
-

5 bathroom makeover ideas
Bathrooms are high-traffic places and normally get used multiple times per day. For this reason it's no wonder that our bat...
-
The importance of bathroom ventilation
The bathroom is a place that can get very hot and steamy, making air circulation and ventilation incredibly important. Mois...
-
Difference between left hand and right hand bathtubs
One of the most common ways we like to maximise the use of space in a bathroom with limited floor area is by installing a s...
-

How to increase water pressure in your shower
Getting into the shower is supposed to be one of life's pleasures and is usually a fantastic way to start the day. However,...
-

How to clean a shower head
Most of us take our showers for granted and only realise how important they are to our everyday lives and wellbeing when th...
-

Rain showers: everything you need to know
If you're currently planning out a bathroom restoration, then one of the decisions you'll have to make is what kind of show...
-
What products can you use in a whirlpool bath?
Relaxing in your whirlpool bath is incredibly beneficial for your mental and physical wellbeing, but what if you want to cr...
-

How to stop a bath shower screen from leaking
One of the main benefits of having a shower is the speed and simplicity it provides over having a bath. So when you jump ou...
-
Should replace your bath with a shower?
If you are renovating or upgrading your bathroom, then one of the key decisions you could well be thinking about is whether...
-
The most asked questions about shower valves
1. How does a thermostatic shower valve work? Thermostatic showers contain a 'mixer' valve, which provides hot and c...
-
How much does a bath cost to run?
Having a bath is an absolute pleasure and it's one of the most relaxing things we can do in the confines of our own homes. ...
-

Common questions about acrylic baths
Acrylic baths make up a huge proportion of baths sold every year in the UK, so in this article we answer some of the most p...
-

How to replace a thermostatic shower valve yourself
If you've got a few tools and have had a go at a bit of plumbing work in the past before, then replacing a thermostatic sho...
-

How to fix a leaky shower
A shower that is dripping water can be a really irritating problem. If it's occurring in an en-suite and can be heard when ...
-
5 ways to save water with an eco-friendly bathroom
It's estimated that the average person in the UK uses around 140 litres of water per day, which may come as a surprise to m...
-

How to manage bathroom condensation
Your bathroom tends to be he most humid room in your home, due to the amount of baths, showers and washing that goes on in ...
-
Bathroom mixer tap dripping or leaking? What to do
Mixer taps are incredibly popular in modern bathrooms and a more and more people are choosing them over the more traditiona...
-

The different types of bath wastes explained
The world of bath wastes - the mechanism that allows you to drain your bath - is actually more varied than you might think ...
-

How to clean chrome bathroom taps and mixers
Chrome is a fantastic material that really looks great on bathroom taps. However, if you don't keep on top of maintenance a...
-

Can you use bath salts in whirlpool tubs?
You can use pink Himalayan salts, Epsom salts and Dead Sea salts in whirlpool tubs. These are lovely salts to add to any wh...
-

What makes a good bathroom for couples?
When it comes to designing the perfect bathroom for the two of you, it's important that you create something that suits bot...
-

Found a leak in the bathroom? Here's what to do
If you've discovered a leak in your bathroom then it's very important to identify the source and deal with it quickly. Leak...
-
Modern master bathroom ideas and inspiration
Your main bathroom is an incredibly important room and is an area of your home where you spend a huge amount of time. It's ...
-
The most common bathroom sink questions
In this article we'll answer some of the most common questions we hear when it comes to bathroom sinks and basins. ...
-
Common questions around painting your bathtub
If you're thinking of painting your bathtub, then we've compiled this handy list of frequently asked questions on the subje...
-
A quick guide to bathroom vanity units
If you're redesigning your bathroom, it's very likely that you're looking at installing a bathroom vanity unit. Not only ar...
-
How to make a small bathroom feel bigger
Though we all love the idea of a huge family bathroom, it's not always possible in the modern world. Many of us have small ...
-
Does colour therapy work?
Chromotherapy (therapy by colour) has long been in practise and actually dates all the way back to the ancient Egyptians. W...
-
Adapting a bathroom for the elderly
An easily-accessible bathroom is vital for dignity and having a high standard of life, so adapting a bathroom for use by an...
-

Tips to instantly relieve stress
Whether it's due to work, social isolation or something else, it's important for our long term physical and mental health t...
-
Recreating the spa experience at home
With more homeowners expecting more bathrooms per house than ever before, adding a new bathroom is now recommended by estat...
-
Baths vs showers: which is more hygienic?
When it comes to bathing or showering, both are incredibly hygienic and will leave you feeling refreshed, with neither bein...
-
How to clean a glass shower screen and seal
The bathroom is a very busy room and it can quickly get dirty. Many bathroom designs revolve around minimalism and their st...
-
Common questions on bathroom wallpaper and paint
The bathroom 'Wallpaper v Paint' dilemma is a debate that's raged for millennia. It's these kind of decisions that ...
-

Can you wallpaper a bathroom?
Getting the decor right in your bathroom is a very important job because it's somewhere that you'll be spending a lot of ti...
-

Creating a low maintenance bathroom
Because we use the bathroom so much, it's inevitable that it will need cleaning more often than other rooms in the house. ...
-
Top 5 bathroom accessories for your wishlist
If you've just redecorated or you're thinking about giving your bathroom a freshen-up, one of the easiest ways to take your...
-
How do thermostatic shower valves work?
Thermostatic shower valves are becoming more and more popular as people seek to increase control over their shower and get ...
-

Tips for bathrooms without windows
With an increase in squeezing in toilets and en-suites for use in the home, it's very likely that you have some sort of bat...
-

Does bathroom paint stop mould?
Because of the amount of moisture in the air caused by bathing, showering and washing, your bathroom is the most likely roo...
-

Bathroom Paint and Colour Schemes 2020
By introducing colour and texture, your bathroom no longer needs to look cold and uninviting. Adding bold splashes of colo...
-

How to make the most of odd shaped bathrooms
When it comes to bathrooms, not all are created equal. Bathrooms and en-suites are often squeezed into houses to provide ex...
-
Limescale build-up in your bath and how to remove it
If you live in certain areas of the UK, then limescale forming in your bath can be an annoying problem that you may want to...
-

Everything you need to know about Epsom bath salts
Epsom bath salts grow ever more popular as a way to make baths as relaxing as possible. In this article we answer t...
-
4 small baths for very small bathrooms
Here at Luna Spas, we recognise that everyone's bathing needs are different. This is why we try and offer a large range of ...
-
Essential modern bathroom furniture ideas
Aside from the standard toilet, basin, shower/bath combo, there's a few great pieces of furniture that can transform your b...
-
Bath mixer taps: what to look for
Mixer taps for filling baths are basins have been popular for a long time now. They're practical and they look incredibly s...
-
How to install a new bathtub at home
If you're in the process of renovating your bathroom, then one of the main jobs you'll need to do is install your bathtub. ...
-

How to buy a two person bath
After our recent post regarding how to find a comfortable bathtub, we thought those of you looking for a romantic whirlpool s...
-
Decorating bathrooms without windows
A windowless bathroom can initially seem like a difficult room to decorate. Because there are no windows for ventil...
-
Common bath problems and how to fix them
There are occasions when an issue may arise with your spa bath. While it can be annoying, it doesn't necessarily mean that ...
-
How to install and replace a bath waste
The bath waste is the part responsible for the safe drainage of your bath once you let the plug out. It is also connected t...
-
How to fit and install a bath screen
Many people have baths at home and would like to install a bath screen to stop water from making a mess outside the bath wh...
-

Best plants to keep in your bathroom
In a day and age where more and more of us are living in urban areas where outside space is at a premium, it's a great idea...
-

Bath vs showers: what uses more water?
It's commonly assumed that baths waste far more water than a shower and that a shower is the more water efficient way of wa...
-

What is the standard bath size?
When considering what type of new bathroom suite to install in your bathroom, one of the most common questions is regarding t...
-

Common health questions on taking baths in 2020
One of the most relaxing things you can do at home is to take a nice hot bath. Closing the door, lighting some candles and ...
-

Bathroom paint ideas for your home in 2020
Because bathrooms are well used and are exposed to a lot of moisture, paintwork can become discoloured and faded over time....
-
DIY bathroom tile designs and ideas
One of the most fun things you can do when redecorating your bathroom is choosing your tiles. Getting the right tiles on th...
-
How much does a bathroom renovation actually cost?
A common question when thinking about giving your bathroom a makeover is how much will it actually cost me? It's an importa...
-

Best budget bathroom designs and ideas 2020
It's absolutely possible for you to redesign your bathroom without spending a small fortune. While most home design...
-
How to fix a clogged bathroom drain
Our bathrooms are one of the busiest rooms in our home so it's inevitable that the shower or basic drain is going to need u...
-
Easy bathroom DIY ideas to work on at home
The Covid-19 situation has meant that a vast majority of us are stuck at home thinking of things to do. There is on...
-
Things to do at home to relax
During these challenging times, you are probably spending a lot more time at home than under normal circumstances. ...
-
Space saving ideas for your bathroom
If you've ever stayed in a capsule-style hotel that are popular in Japan, you've probably been amazed at the incredible use o...
-

How to measure water pressure
Water pressure is the measure of how much force it takes to push water from the mains supply and into the pipework that run...
-

Grey Bathroom Design Ideas & Inspiration
Everyone is familiar with black and white bathrooms, but this has often meant that another obvious colour choice has been o...
-
Bathroom Storage Ideas for Small Bathrooms
Even with the best intentions, bathrooms can quickly become disorganised and messy. It's not surprising because the bathroo...
-

What exactly is Hydrotherapy?
Hydrotherapy is basically the use of water to alleviate pain relief and promote well-being. It often involves doing exercis...
-

How to have a relaxing bath
Taking a nice warm bath is one of the best ways to relax. We can shut the door, lean back and forget about our problems as ...
-
How to fit an acrylic bath panel
If you are redoing your bathroom, but want to keep some of your costs down, a fairly easy task you can do yourself is fitti...
-

Do baths help colds?
If you're feeling the effects of a cold or flu-like symptoms, then you may want an alternative to lying in bed or on the so...
-
Top Ideas For Your Perfect Family Bathroom
Creating a family bathroom can be quite a challenge as you usually need to fit in more than normal to cater for all the famil...
-
5 Frequently Asked Bathtub Questions
Choosing the right bathtub for your home is not always easy. Below we've included some of the most common questions...
-
Small bathroom bathtub ideas
A popular bathroom fashion in recent years has been the removal of bathtubs in favour of large showers or wet rooms, especi...
-
Should you paint your bathroom?
If you are on a tight budget, but your bathroom is in need of a refresh, painting your bathroom can be an economical way of...
-

What Kind of Bathroom Extractor Fan do I Need?
One of the main purposes for having an extractor fan in your bathroom is to get rid of bad air and to prevent mould by stop...
-

How to tile your bathroom wall
Tiles can make an excellent wall and floor covering for bathrooms. They're waterproof, hard-wearing and also look really go...
-

Do baths help you sleep?
It's common for us to associate having a shower in the morning. It's part of our getting ready for the day routine and we o...
-

Are Baths Good for You?
Throughout human history, taking a bath has been associated with health benefits. The Romans, for example, placed hu...
-
5 Simple Bathroom DIY Ideas
If you're planning a complete remodelling of your bathroom, then this is a job for a professional. They will be able to giv...
-

Essential Oils in Baths
One of the most relaxing things you can do is to take a warm bath on your own in the comfort of your bathroom. Escap...
-
All white bathroom design ideas
“For those colours which you wish to be beautiful, always first prepare a pure white ground.”– Leonardo Da Vinci ...
-

The best bath tub accessories for comfort
Obviously, getting into a lovely warm whirlpool bath feels amazing and fully luxurious. Now imagine if you could ad...
-
10 stunning bathroom designs to inspire you
When your searching for ideas to create you own little oasis at home, it usually helps to take a look at a variety of desig...
-

Ideas for Creating a Relaxing Bathroom
Your bathroom should be a place that you retreat to in order to escape the pressures of work and life. Alternatively, it co...
-
Spring Cleaning: Tips for Your Bathroom
The bathroom is one of the most used rooms in your home. As a result, it can also be the quickest to get dirty. This...
-
5 bathroom ideas for a modern home
The bathroom tends to be the one room that gets neglected when we are decorating, as it can be difficult to create the look a...
-

Interior design advice for bathrooms
When redesigning your bathroom, there are plenty of design considerations that you need to take into account to ensure space ...
-

Our Top 5 Bath Filler Valves for your bathroom
Selecting the correct bath filler valves (or 'taps' as you might know them) is an important part of the bathroom interior d...
-
10 of the most amazing bathrooms in existence
Because your bathroom is one of, if not the, most used rooms in your house, it's important to make it as comfortable and lu...
-

11 Inspirational Pantone Rooms Worldwide
In this article we've combined a selection of our favourite rooms from all different types of environments around the world...
-
6 amazing 'before & after' bathroom images
If you are not particularly creatively minded then the prospect of redesigning your bathroom can be a bit daunting. ...
-

10 inspirational bathrooms from around the world
In this post we've collated some outrageously beautiful bathrooms from around the world. These have obviously been designed b...
-
Our Top 5 Corner Whirlpool Baths
Adding a corner bath to your bathroom is a fantastic way to introduce some luxury and comfort into your home. Not only to ...
-

Our top 5 bathrooms with freestanding baths
When imaging your dream bathroom, one of the first things that springs to mind is the romantic idea of a freestanding bath. ...
-
A few boiler maintenance tips to keep your bathroom cosy
It is a really good idea to maintain your boiler and the best thing you can do is give it a yearly service provided...
-
The welcoming warmth of a heated towel rail in your bathroom
Adding a heated towel rail into your bathroom not only dries damp towels, but also has the ability to add an bit of style and...
-

5 money saving tips for your heating controls
The rising cost of gas prices (and therefore heating bills) is in the news constantly. But winter gets very cold in the UK, s...
-
Choosing radiators or underfloor heating for your bathroom
When choosing a heating system for your bathroom and house in general, a key factor to consider is how you want the space hea...
-
How to bleed a radiator in your home
If your radiator is cold at the top and warm at the bottom, then it is fairly likely that it has trapped air in it and will r...
-

How to plan the refurbishment of your bathroom
The bathroom should be a place in which you can feel at peace and relax. Very often the bathroom can be the coldest and...
-

How to choose a good plumber for your bathroom
The first thing to take into consideration is to determine exactly what work you need to be carried out. For smaller jobs suc...
-

Top Tips For Saving Water In Your Home
Knowing how to save water is an important skill to put into practise all year round, regardless of whether it's a scorc...
-
Bathroom heating and lighting ideas for your home
Have you got the bathroom blues? Is it all a bit cold and dim in your wet room? If the answer is ‘yes’ it may be time to brig...
-

A few cheap ways to improve your home
All you have to do is to turn on the TV news and you will be bombarded with bad news about the economy. 'Doom. Gloom. Brex...
-

How we use much more water than we think in Britain
A recent water saving research campaign by a bathroom manufacturer revealed that people use an average of five times the amou...
-
How best to save water & save money
Given the current climate, we are all looking for ways in which we can save ourselves a bit of cash here and there. A grea...
-

The different types of shower options for your bathroom
A shower is a shower isn't it? Well, no, actually. There are different types of shower available to add to your bathroom, ...
-

A quick guide to help you plan a new bathroom
The cost of a new bathroom can vary. The average bathroom costs around £3,000, but costs can vary from a few hundre...
-

How to choose the right kind of bathroom flooring
Apart from when you clean it you probably never consider your bathroom floor. Why would you? If you were to draw up a l...
-
Create a feeling of glamour in your bathroom
Just a few short years ago The Great Gatsby seemed to be everywhere. There was a new film version of the book th...
-
How to create an amazing spa-style bathroom
There is nothing like a nice spa break to a posh hotel somewhere in the countryside to recharge those batteries. Wouldn’t ...
-
How to choose the right bath for your bathroom
Regardless of the shape and size of your bathroom you will certainly be able to find a model to perfectly suit the available ...
-

An essential checklist for a bathroom refurbishment
Refurbishing the bathroom can be daunting. There are lots of things to take into consideration from deciding how much you can...
-

Ten of the best design ideas for a small bathroom
Having a small bathroom doesn’t mean that you can’t create a stylish space. There are plenty of ways in which you can achi...
-
Top tips for creating a warm and inviting bathroom
Now is the perfect time to ensure that your bathroom is transformed into a warm and inviting space. Here we share our top ...
-
How best to clean your shower correctly
Ensuring that your shower enclosure looks in top condition can be a difficult challenge and over time shampoo and shower gel ...
-

How to Remove & Prevent Mould in the Shower
Keeping your shower enclosure looking in top condition can be a challenge especially when it comes to removing and preve...
-
10 ideas to create a hotel style bathroom
Need some inspiration for your new bathroom design? Why not consider creating a hotel style bathroom, which will provide y...
-
10 Contemporary Shower Room Ideas
Designing and creating a new shower room can be a challenge and sometimes all you need is a little inspiration to help you al...
-

5 reasons to buy a handheld shower for your bathroom
As the average person has 28,000 showers throughout their lifetime choosing the right type of shower to suit your needs is im...
-
6 Ways to Create a Cool Minimalist Bathroom
With sleek, minimalistic bathrooms set to become one of the key trends this year, creating this look has never been easier. ...
-

6 Energy Saving Tips for the Bathroom
Whatever the weather, now is always the ideal time to ensure that your home is as energy efficient as it can be, but more oft...
-

5 Tips to Consider when Installing an En-Suite
Creating an extra bathroom or an en-suite is ideal for adding extra value to your home and can provide a selling feature for ...
-
Top Tips for Creating a Modern Cloakroom Suite
Your cloakroom suite will most likely be the smallest room in your house, but this doesn’t mean that you can’t create an ultr...
-
5 great ways to update your tired bathroom
Updating the bathroom doesn’t have to be a challenging experience and there are plenty of ways in which you can create a fres...
-

How to create a classic bathroom in your home
Need some inspiration for your new bathroom? Then why not consider creating a classic, timeless look that will stand the test...
-
A Guide To Bringing Your Bathroom Back To Life This Spring
With spring fast approaching, now is the perfect time to start planning and creating a fresh new look in your bathroom. Th...
-
How to install a sleek and contemporary wetroom
A wet-room is very often found in an ultra-modern hotel and it’s the ideal way to create a very sleek, streamlined bathroom i...
-
How to Transform Your Attic Into A Stunning Bathroom
Transforming your attic space into an extra bathroom is a great way to make use of what otherwise could be wasted space, plus...
-

How to create a beautiful country bathroom
Creating a country bathroom will provide you with a calm and relaxing space for you to unwind in after a long day and this ar...
-

How to create a brand new stylish bathroom
How should I plan the layout? It’s a good idea to draw a basic scale plan of your bathroom and mark the location of the wast...
-
Top Tips for Adding Value to Your Bathroom
For those looking to sell their home or want to know how to add value to a property, there are a variety of ways in which you...
-
Whirlpool Baths: Are They Worth It?
A question many first-time buyers face when thinking about ordering their first whirlpool bath is “are whirlpool baths worth ...


